Saturday, 5 November 2011

Seed of an idea

The temptation to grow some vegetables was too much! We had a really long garden bed, so why not?

We wanted a raised one to keep the dogs from getting into it. But our sunny spot in the garden had a downward slope. Thankfully, we found Birdie's raised garden bed, which was perfect! We assembled it, filled it with soil and were all set. On the way, we picked up the 42nd edition of Yates Garden Guide book. It was written for the Australian environment and covers everything from pests, propagation and watering to a comprehensive plant index suited to the local climate. It also has some great tips from other gardeners which I found very useful.

Now on to picking the vegetables! Naturally, it makes sense to pick the ones that we eat. But not all the ones we eat are easy to grow. For example, cabbages, carrots, onions and cauliflowers need so much space and they can be harvested only for a short time. And some of the others that we eat, are not available here like mooli (white radish), bhindi (okra) etc. So, we started with the very basic one - potato.

I got some good information from the Seed to Plate website, which gave information about various vegetables and how to grow them at home. Potato is the easiest to grow and also helps prepare the soil for other fussier vegetables. We did not buy the seed potatoes which are disease resistant because there were just too many in the bag. After all, I did not want to start a farm! We just planted a couple of sprouting potatoes from our veggie shopping. We also planted a few seeds of methi (fenugreek) and dhania (coriander) with the seeds picked from our spice rack. They all started sprouting up plants in two weeks!

Seed to plant - methi sprouts

Seed to plant - methi with leaves

Seed to plant - potato shoot

Seed to plant - potato plant
I mentioned in the previous post to resist the temptation to buy additional items when you buy plants. I learnt that lesson - and then promptly unlearnt it in the next trip! We bought a seed tray and some seeding soil mix, along with various seeds. In the end, the purchase was worth it as gave us the opportunity to try our hand at growing many vegetables. In the picture below you can see cauliflower, coriander, mint, carrot, onion, chilli and pumpkin.

Seed raising box


Seed to plant - Onion
Seed to plant - Mint

Seasoned gardeners may know that not all of these vegetables grow in the same season. But, we were novices and did not know that. We got seedlings from all of them, but some could not survive the exposure in the veggie patch. We also bought Basil and Chilli plants.

Chilli
Basil

Our final purchase was a lime tree. Lime is quite expensive in Australia but we eat them a lot, so this was a good investment. We looked forward to eating our first home-grown vegetables!

Lime

Saturday, 8 October 2011

A green shopping list

So, there we were, standing in the garden section of Bunnings and wondering what to do because the plants on our list were unavailable! That was our first lesson.

Lesson 1: Have a plan B when the local nursery doesn't stock the plant you want.

Lilly Pilly

Anyway, there were enough knowledgeable people around who could help us pick out something else. We came home with a native tree called Lilly Pilly. It was to be our screening plant (or neighbours-be-gone as called in Australia!). It was already 3 feet tall and expected to grow by a foot every year.We ended up buying a native plant specific fertilizer and a Lilly Pilly disease resistant tablet and also learnt our second lesson in the process.

Lesson 2: The nursery will sell you all sorts of paraphernalia that you don't need.

The Lilly Pilly was so big that it took us novices the better part of the evening to plant it. It took us a couple of hours to get it out of the pot itself! We were trying to beat the sunset but could not finish the mammoth task before it became dark. After struggling to plant such a big (and extremely expensive) tree, we decided to never buy a mature plant.

Lesson 3: Better to grow a plant from seed or a cutting, than to waste money on a mature plant.

Having learnt some new lessons in life, our second purchase was much more practical. We bought young plants of African Daisy, Myoporum and a different kind of Lilly Pilly. These were intended to flank the Lilly Pilly tree. The Myoporum is an Australian native ground cover, we wanted to use it as a garden bed edging. The African daisy was going to give some cheer all year round with random flowering. We were very pleased with the final result.

Our loot!


African Daisy

Before mulch

There was one last thing to do which is a typical garden addition in Australia - mulch. Mulch is widely used in the garden beds and serves a dual purpose of preventing evaporation and preventing weeds from growing. It gave a very nice finish to the garden bed.

After mulch

Monday, 6 June 2011

Cementing our place in the gardening world

As we are told several times on "Better Homes and Gardens", when you want to makeover an area, you should always start by removing everything. A quick phone call to our landlord, and all was agreed upon. The old bushes and the lawn had to go. It was also decided that the patch behind the house should be cemented over. The only thing that stayed was the structure of the raised garden beds. A team was hired to execute this operation. The doggies were a bit disappointed at having been locked up inside the house for three days, but in the end we had a clean slate outside.

Work in progress
Work in progress

Work in progress
We needed a new lawn, which was arriving on the weekend. Our first ever gardening task was to level the soil where the turf would be laid. It rained all week and I am ashamed to say that I let the weather get the better of me, so Anshuman did all the levelling.

The turf arrived on the Saturday. It was a new experience for us, we had never seen a lawn being formed before. First, the rectangles of turf had to be laid out to cover the soil. Then, ideally a roller should be rolled across to level it and remove air pockets. We did not have one, so we just walked over it. Finally, we watered it every day for the roots to set. After two weeks of hard work (mainly by someone else!), we had a brand new garden to work with. The time for planning had started!

Laying of turf

We planned our garden several times - both on paper and virtually. There are various free online tools, but we used Garden Planner to start with. It was a pretty cool tool, they have tonnes of options to add to the layout like trees, shrubs, flowers, lawns, building, vegetables etc. It had a grid and each addition could be adjusted to the actual size. It gave us a very decent idea of what we could fit in our garden.

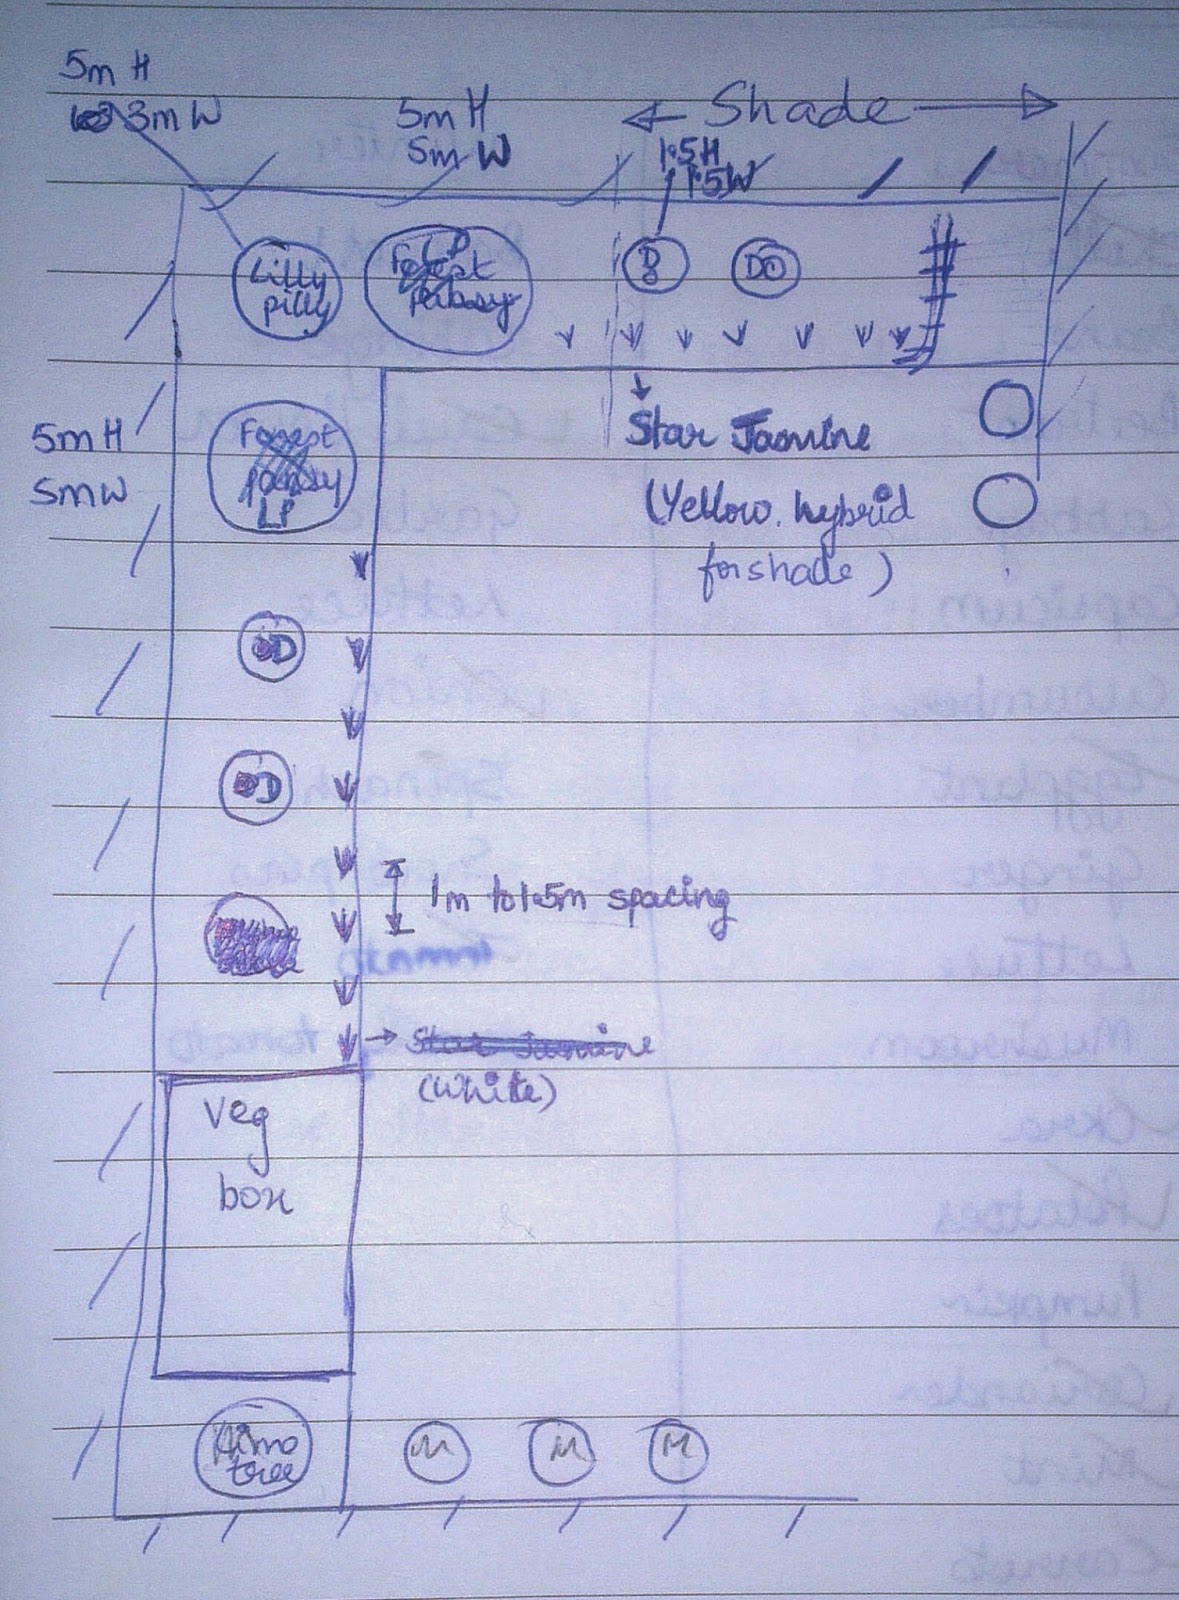
Next we made a paper layout, which allowed us to edit more. We had grand ambitions of a veggie patch, a garden full of flowers and trees to block out the neighbours spying on us. But, as Hercule Poirot says, we had to approach this with 'order and method'! First, we had to decide what we wanted as permanent features in the garden, as both vegetables and flowers have short lives. It was fun researching on the internet for plants that suited that requirement.

Garden layout draft
After much research, we settled on plants native to our location to start the project with. There were so many options to choose from for trees, shrubs and even flowers. All had the advantage of being local and hence, were suited to the unpredictable Melbourne weather. Our first ever plant shopping list was taking shape!